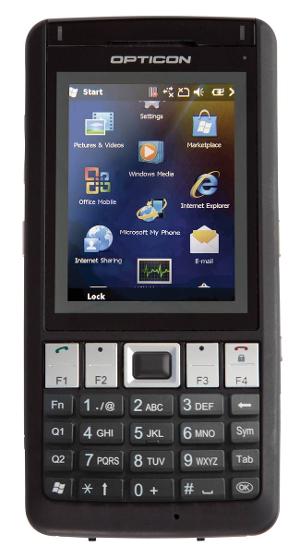
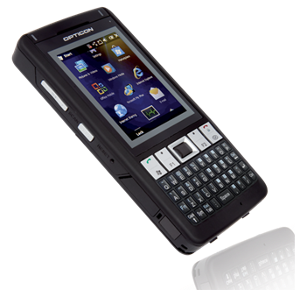
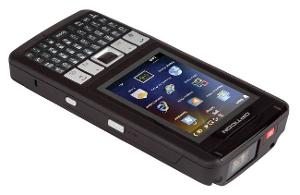
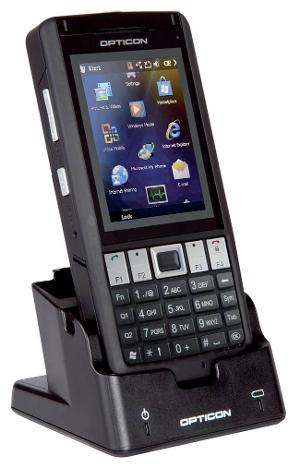
H21
The H-21 is Opticon's Windows Mobile 6.5 smart phone with an embedded scan engine.
Firmware Upgrade
ActiveSync Method
This process requires a Windows PC with either ActiveSync version 4.5 (for XP) or Windows Mobile Device Center (for Vista and 7).
- Download the latest firmware for your H21 from here.
- Install a battery of at least 30% charge
- Power on your H21
- Connect the H21 to the PC via USB cables
- Note: it is recommended not to use a USB hub and to connect directly to a USB port on the back of the PC as appropriate
- Wait for ActiveSync or WMDC to display 'connected'
- Launch the Firmware Upgrade Utility you downloaded previously
-
- Check the box on the first screen and select 'Next'
- Wait for the Utility to check your USB connection and battery life and then select 'Next'
- You may check the box to 'Format extended partition' at your discretion. This does not affect the OS upgrade process, only formats the 'Disk On Chip' portion of the hard drive
- The Utility will reboot the H21 into a firmware upgrade mode and proceed to upgrade the firmware
- The 'Cancel' button will change to 'Finish' when the Utility has finished its part of the process.
- You must still wait for the H21 to boot to the Windows Mobile Initial Setup dialog before the upgrade is complete.
- You may disconnect USB but do not power off the H21 or remove the battery for any reason.
- The firmware upgrade is complete when you see the following text on screen. You will hear two beeps from the H21 while it is loading. On the second you should see this text.
Tap the screen to set up your
Windows® phone
SD Card Method
This process requires a micro SD card up to and including 16GB capacity.
- Download the latest firmware for your specific H21 from here.
- Copy the firmware files to a blank micro SD card. The firmware files must be uncompressed (unzipped) before copying to the SD card. There are many files in the 'flash' download. All must be copied to the SD card for the installation to be successful.
- Power off our H21.
- Install the SD card into the H21. Note that there is a slide lock for the SD card door inside the battery compartment that must be unlock before the door will open. It is recommended to lock this door during the upgrade process. when properly inserted the contacts on the SD card will be facing the front of the device.
- Install a battery with at least 30% charge and close the battery door. Both the slide and turn lock must be engaged for the upgrade to proceed.
- While holding the keys <capture>, <right scan> and <volume down> press and hold the power key.
- The capture key is on the right side of the phone with an icon of a camera on it. The right scan key is just above the capture key. The volume down key is the portion of the double-button on the left side of the phone that is closest to the left scan key.
- It takes only a second for the firmware upgrade screen to load. This is a black screen with bluish text. It takes only a minute or two for the firmware upgrade to complete.
- The process is done when you see the following text on the screen. This will be spelled out very large at the bottom of the screen.
Download
OK
- Using the stylus press the reset switch on the left side of the device. If the device does not reboot automatically simply press te power key at the top of the device.
- The firmware upgrade is complete when you see the following text on screen. You will hear two beeps from the H21 while it is loading. On the second you should see this text.
Tap the screen to set up your
Windows® phone
Setup Internet Connection
These instructions step you through setting up internet connections on the H-21 through your cellular carrier.
- Install SIM card with valid Data plan
- Your cellular account must have a valid data plan activated for internet connections to function on the H-21. Contact your carrier for details.
- The SIM card must be installed under the battery of the device for internet connections to function on the H-21.
- Power on your device
- Enable Phone
- Navigate to Start > Settings > Connections > Wireless Manager
- If the Phone button is OFF tap it once to turn it ON
- Tap OK
- Remove any preexisting connections
- Navigate to Start > Settings > Connections > Connections
- In the section My ISP find and tap Manage existing connections
- Note: If no preexisting connection exist this entry will not be available. Please skip to Step 4.
- Once for each connection listed tap and hold the line and select Delete from the popup menu. Tap OK when complete
- Add New Connection
- Navigate to Start > Settings > Connections > Connections
- In the section My ISP find and tap Add a new modem connection
- Choose whatever name you wish for the connection
- Under Select a modem choose Cellular Line (GPRS) and tap Next
- Enter the Access point name for your carrier (ATT: wap.cingular, T-Mobile: wap.voicestream.com) and tap Next
- Note: The Access point name can differ from region to region. Contact your carrier if the above suggestions do not work.
- The User name, Password, and Domain fields are left blank. Tap Finish
- Complete
Factory Reset Instructions
Warning! - Performing a factory reset will delete any and all user data and personal applications that are loaded on the device. Please back up your data before performing this operation. Note that the 'FlashDisk' portion of the disk is untouched by this operation and can safely be used as permanent data storage in such circumstances.
Via Windows Mobile
This factory reset method uses an application within Windows Mobile to perform a reset to factory defaults.
- Navigate to 'Start' > 'Settings' > 'System' > 'Restore To Factory'
- Type '1234' in the box as prompted
- Tap 'Reset' (which is unavailable until you type '1234' correctly
- Tap 'Yes' when prompted
- You will see the white splash screen again, this time for a bit longer than usual. The operation is complete when you see the following text:
Tap the screen to set up your
Windows(r) phone.
Via Hardware
This factory reset method uses a hardware button combination to perform a factory reset. It is best used for when some event causes Windows to be inaccessible.
- Power Off the H21
- Press and hold the red power button on the top of the device for a full 3 seconds.
- Tap 'Yes' when prompted
- While pressing and holding [CAPTURE] + [END] additionally press and hold [POWER] for approximately 3 seconds or until you feel the H21 vibrate briefly.
- The CAPTURE button is the camera key on the lower right side of the device.
- The END key is the red phone disconnect button on the front right of the device.
- You will see the normal white bootup splash screen for a couple of seconds. Next you will see a large WARNING dialog with 'YES' and 'NO' options.
- Using the buttons below the screen choose either 'YES' or 'NO' (note that the touch screen does not work outside of Windows).
- The buttons to use are just below the display and are labeled simply with a small black dot to indicate that they are for use with whatever the screen says above them.
- You will see the white splash screen again, this time for a bit longer than usual. The operation is complete when you see the following text:
Tap the screen to set up your
Windows(r) phone.
Determine Current Firmware Version
You should only need to look up this information when prompted to do so by an Opticon employee.
- Navigate to: 'Start' > 'Settings' > 'System' > 'Device Information' > 'Version' (tab)
- Take note of the following two lines:
- ROM date
- ROM version It is only necessary to report the first two groups of numbers (i.e. 4.530)
Downloads
Software
| Software | Description | Download |
|---|---|---|
| SDK | The H-21 SDK is two part. The system SDK which is a C++ LIB and Header file as well as the Barcode Reader (BCR) SDK which is installed via the included MSI (Microsoft Installer) program. The BCR portion supports both native and .NET development. See the included documentation. | Download |
| Firmware: Windows Mobile (ActiveSync Install Method | See Upgrade Instructions for details on installation. | Download |
| Firmware: Windows Mobile (SD Card Install Method) | See Upgrade Instructions for details on installation. | Download |
| Notice |
| The downloading and use of any Opticon software implies consent with Opticon's End User License Agreement. |
FAQ
I want to add the default Windows Mobile camera interface to my .NET app, so that users can take pictures. How do I do that?
- This is easily accomplished by using the Microsoft.WindowsMobile.Forms namespace in your .NET application, and using the CameraCaptureDialog class. You can use an instance of the class to show a dialog that provides exactly the same interface you'd find if you opened the camera from OS. Note that the Microsoft.WindowsMobile.Forms DLL is not part of the .NET Compact Framework by default, and is not present on the H21 by default; you must add it as a reference to your .NET application, and deploy it with your application.
Does the H21 SDK have classes to manage and communicate via the IrDA port?
- No it doesn't - Microsoft has already included classes in the .NET Compact Framework to deal with IrDA communication. See the System.Net.IrDA namespace.
Universal Menu Book commands that deal with symbology options return false when sent with the BarcodeDecoder.SendCommand() method. What's going on?
- This behavior is actually by design, because it’s configurable through a different interface.
- If you bring up the ScannerManager app, and go to the Code Options tab, you can hold down the stylus on a symbology and bring up an options page for that symbology. You're able to set different symbology options there.
- In code, say you wanted to send the leading check digit of UPCE codes (menu book code 'E6') to distinguish between UPCE0 and UPCE1. You would do this:
BarcodeReader.BCRSettings.CodeOptions[SYMBOLOGY_ID.CODE_UPC_E].dwTransmitCD = BCR_CODE_OPTIONS_TRANSMITCD.BCR_UPC_LEADING0_TRANSMITCD
How do I strip out the 18th digit from vin numbers
- Navigate to 'Start' > 'Settings' > 'System' > 'Scanner Settings' > 'Code Options' (tab)
- tap-hold UPC
- Select UPC-A when prompted
- under section 'Transmit CD' change to "No leading zero, not transmit CD"
- tap 'OK'
- Tap 'Additional Settings' (tab)
- Tap 'Edit' (button)
- the text "HC" is present by default. Go to a new line and type the following exactly as you see it here: [A00[A0X0C[A0Y[A10[A14Q0Q1[A1CQ0Q0[A1L[A18[A1F
- Tap 'ok' to save the text file
- Tap 'Update' to save these settings
- You should see a popup containing 'Transmit command success'. If you do not please start again at step 1.
- Tap 'ok on the popup and 'ok' again to close the scanner settings.
- You will see a 'wait' icon for a second or two and when gone you are ready to go.


